将表单嵌入网页
从 7.0 版本起,ONLYOFFICE 文档提供了创建、编辑在线表单、开展协作、填写表单以及将表单保存为 PDF 的功能。
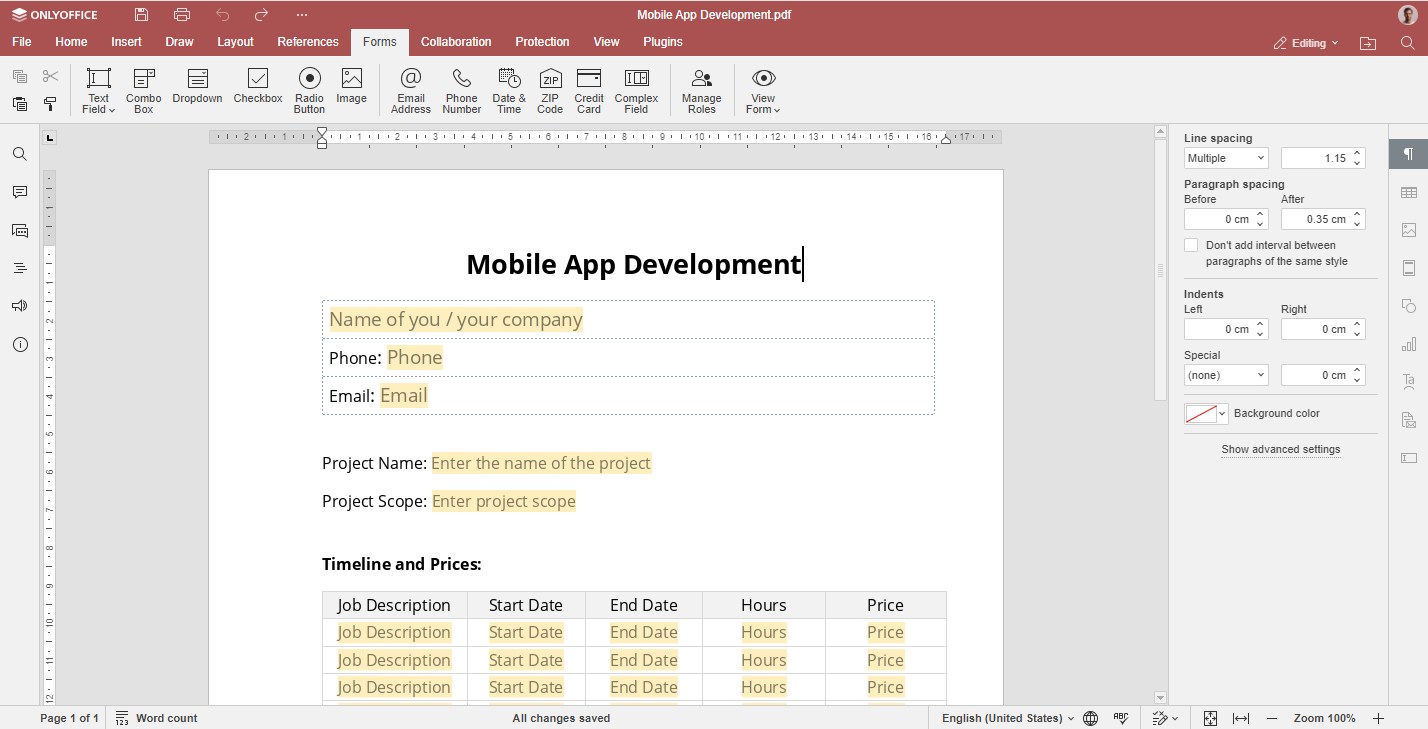
ONLYOFFICE 表单采用 PDF 格式,该格式用于从空白文档或任何现有的 DOCX 文件创建表单模板,也可用于填写已完成的表单。
请注意,从 8.0 版本开始,OFORM 格式已被弃用。若要填写已完成的表单,仅可使用 PDF 格式。
从 8.1 版本开始,DOCXF 格式已被弃用。若要创建和编辑表单,仅可使用 PDF 格式。
这些说明将帮助您把在线表单添加到您的网站上,使其能够保存为 PDF 格式并可进行填写。
请注意,这些说明仅在 JWT 处于禁用状态时才有效。从 7.2 版本开始,JWT 默认是启用的,所以您需要将其禁用。有关令牌的更多信息,可在此处找到。
编辑表单
如何从网站打开 PDF 表单进行编辑
若要从您的网站打开 PDF 格式的在线表单以进行编辑,请按以下步骤操作:
-
找到并打开您的 ONLYOFFICE 文档的index.html 文件。
-
通过指定 API 的 JavaScript 文件路径,将其连接到 ONLYOFFICE 文档 API:
<script type="text/javascript" src="https://documentserver/web-apps/apps/api/documents/api.js"></script> -
添加button元素,以便打开 PDF 表单:
<button onclick="open_form_template()">Open Form Template</button> -
添加div元素,用于确定打开编辑器的位置:
<div id="placeholder"></div> -
添加脚本,以便在编辑器已打开的情况下将其关闭:
if (this.docEditor) {
  this.docEditor.destroyEditor()
} -
创建您需要打开的 PDF 表单的完整 URL 地址:
const url = "https://example.com/url-to-example-form.pdf" -
创建用于标识文件以进行协同编辑的密钥:
const key = `${filename}.pdf` -
添加脚本,使用您想要打开的文档的配置来初始化文档编辑器,并在占位符元素中打开编辑器:
const config = {
  document: {
    fileType: "pdf",
    key,
    permissions: {
      edit: true,
    },
    title: "Form Template",
    url: url
  },
  documentType: "pdf",
};

this.docEditor = new DocsAPI.DocEditor("placeholder", config);
完整的代码片段如下:
<script type="text/javascript" src="https://documentserver/web-apps/apps/api/documents/api.js"></script>
<button onclick="open_form_template()">Open Form Template</button>
<div id="placeholder"></div>
<script>
    function open_form_template() {
        if (this.docEditor) {
            this.docEditor.destroyEditor()
        }
        const url = "https://example.com/url-to-example-form.pdf";
        const key = filename + ".pdf";
        const config = {
         "document": {
               "fileType": "pdf",
               "key": key,
               "permissions": {
                  "edit": true
               },
               "title": "Form Template",
               "url": url
         },
         "documentType": "pdf"
        };
        this.docEditor = new DocsAPI.DocEditor("placeholder", config);
    }
</script>
完成上述操作后,即可打开 PDF 表单进行编辑。编辑完该文件后,您可以填写已准备好的表单。要进行填写,请点击开始填写按钮。
填写表单
如何从网站打开 PDF 表单进行填写
若要使 PDF 格式的在线表单可供填写,请按以下步骤操作:
-
找到并打开您的ONLYOFFICE文档的index.html文件。
-
通过指定 API 的 JavaScript 文件路径,将其连接到 ONLYOFFICE 文档 API:
<script type="text/javascript" src="https://documentserver/web-apps/apps/api/documents/api.js"></script> -
添加button元素,以便打开 PDF 表单:
<button onclick="open_form()">Open Form</button> -
添加div元素,用于确定打开编辑器的位置:
<div id="placeholder"></div> -
添加脚本,以便在编辑器已打开的情况下将其关闭:
if (this.docEditor) {
  this.docEditor.destroyEditor()
} -
创建您需要打开的 PDF 表单的完整 URL 地址:
const url = "https://example.com/url-to-example-form.pdf" -
创建用于标识文件的密钥:
const key = `${filename}.pdf`请注意,key字段不会传递到编辑器的配置中。此字段将自动生成为一个随机数。这使得打开表单的所有会话相互独立。因此,PDF 表单的协作功能被禁用。这就是为什么任何人都可以打开表单并填写,而不会干扰其他人。
-
添加脚本,使用您想要打开的文档的配置来初始化文档编辑器,并在占位符元素中打开编辑器:
const config = {
   document: {
      fileType: "pdf",
      permissions: {
         edit: false,
         fillForms: true,
      },
      title: "Form",
      url: url
   },
   documentType: "pdf",
};

this.docEditor = new DocsAPI.DocEditor("placeholder", config);
完整的代码片段如下:
<script type="text/javascript" src="https://documentserver/web-apps/apps/api/documents/api.js"></script>
<button onclick="open_form()">Open Form</button>
<div id="placeholder"></div>
<script>
    function open_form() {
        if (this.docEditor) {
            this.docEditor.destroyEditor()
        }
        const url = "https://example.com/url-to-example-form.pdf";
        const key = filename + ".pdf";
        this.docEditor = new DocsAPI.DocEditor("placeholder",
        {
            "document": {
                "fileType": "pdf",
                "permissions": {
                    "edit": false,
                    "fillForms": true
                },
                "title": "Form",
                "url": url
            },
            "documentType": "pdf"
        });
    }
</script>
完成上述操作后,即可打开 PDF 表单进行填写。填写完所有必填字段后,您可以提交数据。要提交数据,请点击完成并提交按钮。
