Setting avatars
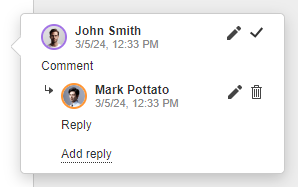
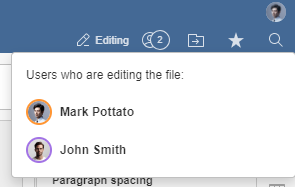
The reference figure and the steps below explain the process of setting the avatars for the users in ONLYOFFICE Docs.
- The user sends a request to get a list of users and set their avatars in the document editor.
- The document editor informs the document manager about the request.
- The document manager sends the list of users to the document editor where their avatars will be displayed.
- The user opens the comments or a list of the co-editors in the document editor where the users' avatars are displayed near their names.
How this can be done in practice
-
Create an empty html file to Open the document.
-
To set the current user avatar, use the editorConfig.user.image field of the initialization config:
const config  = {
  editorConfig: {
    user: {
      group: "Group1",
      id: "78e1e841",
      image: "https://example.com/url-to-user-avatar.png",
      name: "John Smith",
    },
  },
};

const docEditor = new DocsAPI.DocEditor("placeholder", config); -
In the configuration script for Document Editor initialization, specify the event handler for setting the users' avatars. When the user opens the comments or a list of the co-editors, the onRequestUsers event is called with the data.id parameter. The data.c parameter with the info operation type is also passed in this event.


function onRequestUsers(event) {
  const c = event.data.c
  const id = event.data.id
};

const config = {
  events: {
    onRequestUsers,
  },
};

const docEditor = new DocsAPI.DocEditor("placeholder", config); -
In order to set the users' avatars, the setUsers method must be called:
docEditor.setUsers({
  c: "info",
  users: [
    {
      email: "john@example.com",
      id: "78e1e841",
      image: "https://example.com/url-to-user-avatar1.png",
      name: "John Smith",
    },
    {
      email: "kate@example.com",
      id: "F89d8069ba2b",
      image: "https://example.com/url-to-user-avatar2.png",
      name: "Kate Cage",
    },
  ],
});
Where the example.com is the name of the server where document manager and document storage service are installed. See the How it works section to find out more on ONLYOFFICE Docs service client-server interactions.