Writing macros
Now that you know how macros work, try to write your own macro. We have a table and need to color the alternate table rows (odd will be colored green, even will become red). The table contains 200 rows and columns from A to S. It would take a lot of time to do that manually. So, using macros will be the best solution for this problem.
-
Open ONLYOFFICE editors and create a new spreadsheet.
-
Now open the View tab and select Macros. The macros window will pop up. You will be presented with the basic function wrapper which will allow you to enter the necessary code:
(function () {
  // ... your code goes here ...
})() -
Let's consult the Office API documentation to see what we need to complete our task:
-
First, get the current worksheet using the GetActiveSheet method:
let worksheet = Api.GetActiveSheet(); -
Then create a loop to run from the first to the last row:
for (let i = 1; i < 200; i += 2) {
  // TODO: Implement functionality here
} -
Set two variables: one for odd rows, the second for even rows:
let rowOdd = i;
let rowEven = i + 1; -
Now that we can access both the odd and even rows, let's color them in proper colors. Set the desired colors using the CreateColorFromRGB method. Get the cell range within the row using the GetRange method and set the color for the odd rows:
worksheet.GetRange(`A${rowOdd}:S${rowOdd}`).SetFillColor(Api.CreateColorFromRGB(138, 181, 155));The same is for the even rows, but with a different color:
worksheet.GetRange(`A${rowEven}:S${rowEven}`).SetFillColor(Api.CreateColorFromRGB(216, 227, 220));
-
Now let's sum it up with the complete script code:
(function()
{
    let worksheet = Api.GetActiveSheet();
    for (let i = 1; i < 200; i += 2) {
        let rowOdd = i, rowEven = i + 1;
        worksheet.GetRange("A" + rowOdd + ":S" + rowOdd).SetFillColor(Api.CreateColorFromRGB(138, 181, 155));
        worksheet.GetRange("A" + rowEven + ":S" + rowEven).SetFillColor(Api.CreateColorFromRGB(216, 227, 220));
    }
})();
Paste the code above to the macros window and click ![]() . The table rows from 1 to 200 will be colored alternately in less than a second.
. The table rows from 1 to 200 will be colored alternately in less than a second.

Generating macros using AI plugin
If you want to speed up the process, starting from version 9.0, you can use the AI plugin built into ONLYOFFICE to automatically generate ONLYOFFICE macros from their descriptions:
-
Configure the AI plugin. The detailed instructions on how to do this can be found here.
-
Open the View tab and click Macros.
-
Click the AI icon in the Macros window and select Create from description.


-
Input a prompt into the Create macros from description window and click Create. The generated macro sample will be inserted into the Macros window.


-
Review the code and make adjustments if necessary.
While the AI plugin can generate a complete and working macro, it's not always perfect. Make sure to review the output carefully and test it thoroughly, especially for complex macros.
-
Click
 to test the script.
Subscribing to events
To subscribe to the specified event and call the callback function when the event fires, use the attachEvent method.
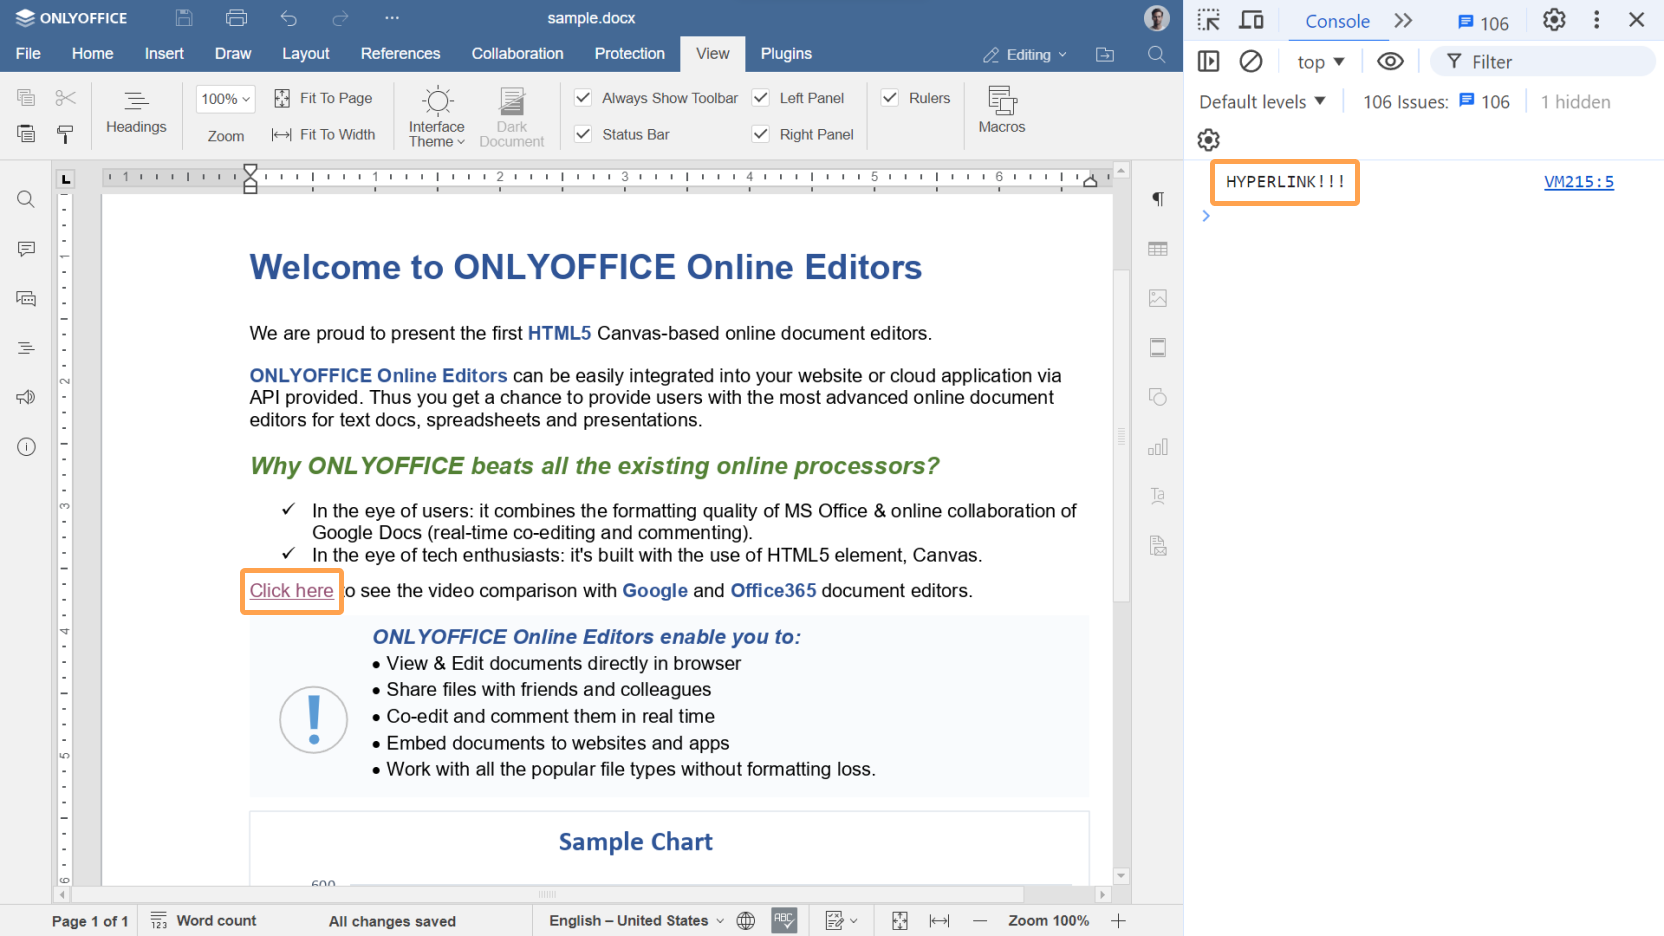
For example, to subscribe to an event when a hyperlink in a document is clicked, use the following lines:
Api.attachEvent("asc_onHyperlinkClick", () => {
  console.log("HYPERLINK!!!");
})
When you click any hyperlink in a document, the asc_onHyperlinkClick event will be executed and the "HYPERLINK!!!" message will appear in the console.
Assigning macros
In the spreadsheet editor, you can assign a macro to the graphic object:
- Right-click the graphic object.
- Click Assign Macro.
- Choose a macro in the appeared window. You can type the macro name in the corresponding field.
- Click the OK button.
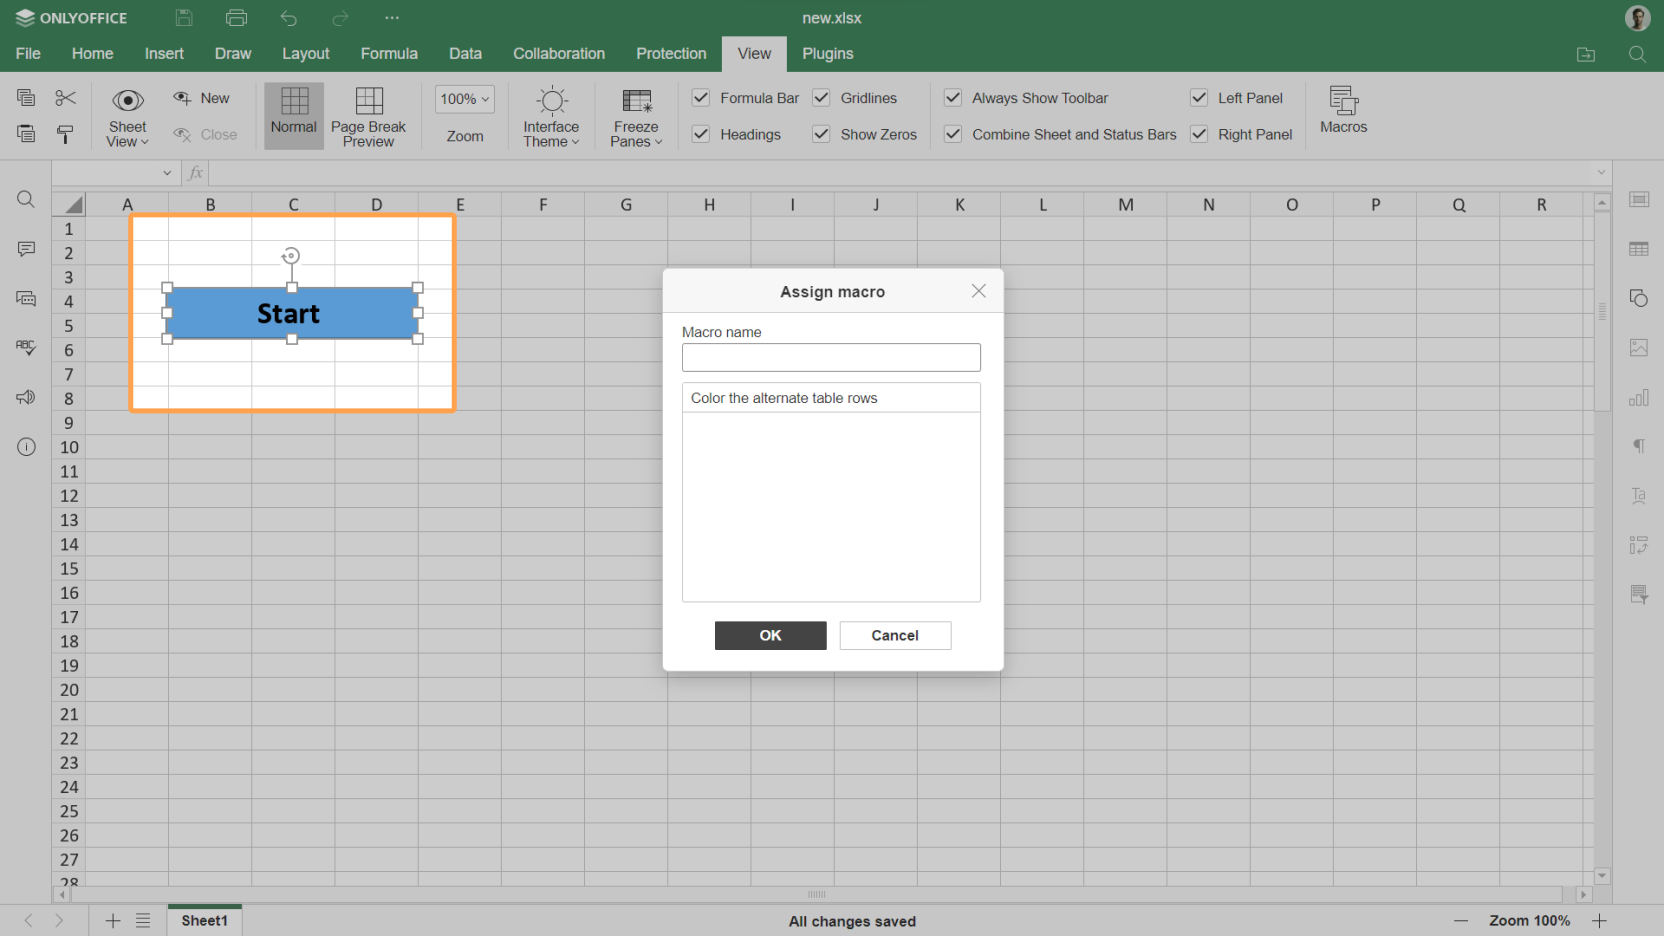
To run the macro, just click the graphic object and the script will be executed.