.Net (C#) example
Introduction
To integrate ONLYOFFICE Document Builder into your own application on .Net (C#) or .Net (C# MVC) you need to download and install ONLYOFFICE Document Builder to your computer and use the .Net (C#) or .Net (C# MVC) example for the integration. This guide will show you the sequence of actions to integrate ONLYOFFICE Document Builder successfully.
Step 1. Download and install ONLYOFFICE Document Builder
First, download ONLYOFFICE Document Builder and install it to your computer:
Get ONLYOFFICE Document Builder
Step 2. Install the prerequisites
To run your website with the ONLYOFFICE Document Builder successfully, check if your system meets the necessary system requirements. It has got to have the following components installed:
- Microsoft .NET Framework: version 4.0 or later (download it from the official Microsoft website);
- Internet Information Services: version 7 or later;
- Microsoft Visual Studio (download the latest version from the official Visual Studio website).
Step 3. Download the .Net (C#) / .Net (C# MVC) example code and build your application
Download the .Net (C#) or .Net (C# MVC) example from our site and unpack it somewhere to your computer.
Open the DocumentBuilder.sln solution file from the unpacked project folder using the Visual Studio application. Wait while the project loads.
Once the project is completely loaded, go to the Visual Studio top menu and choose Project -> Rebuild Solution. The project will be rebuilt, after that you can run it in your browser using the green triangle button with the browser name at the top panel.
Step 4. Running your website with the ONLYOFFICE Document Builder
If you want to run the example application using the Microsoft IIS service, you will need to follow the additional steps below.
-
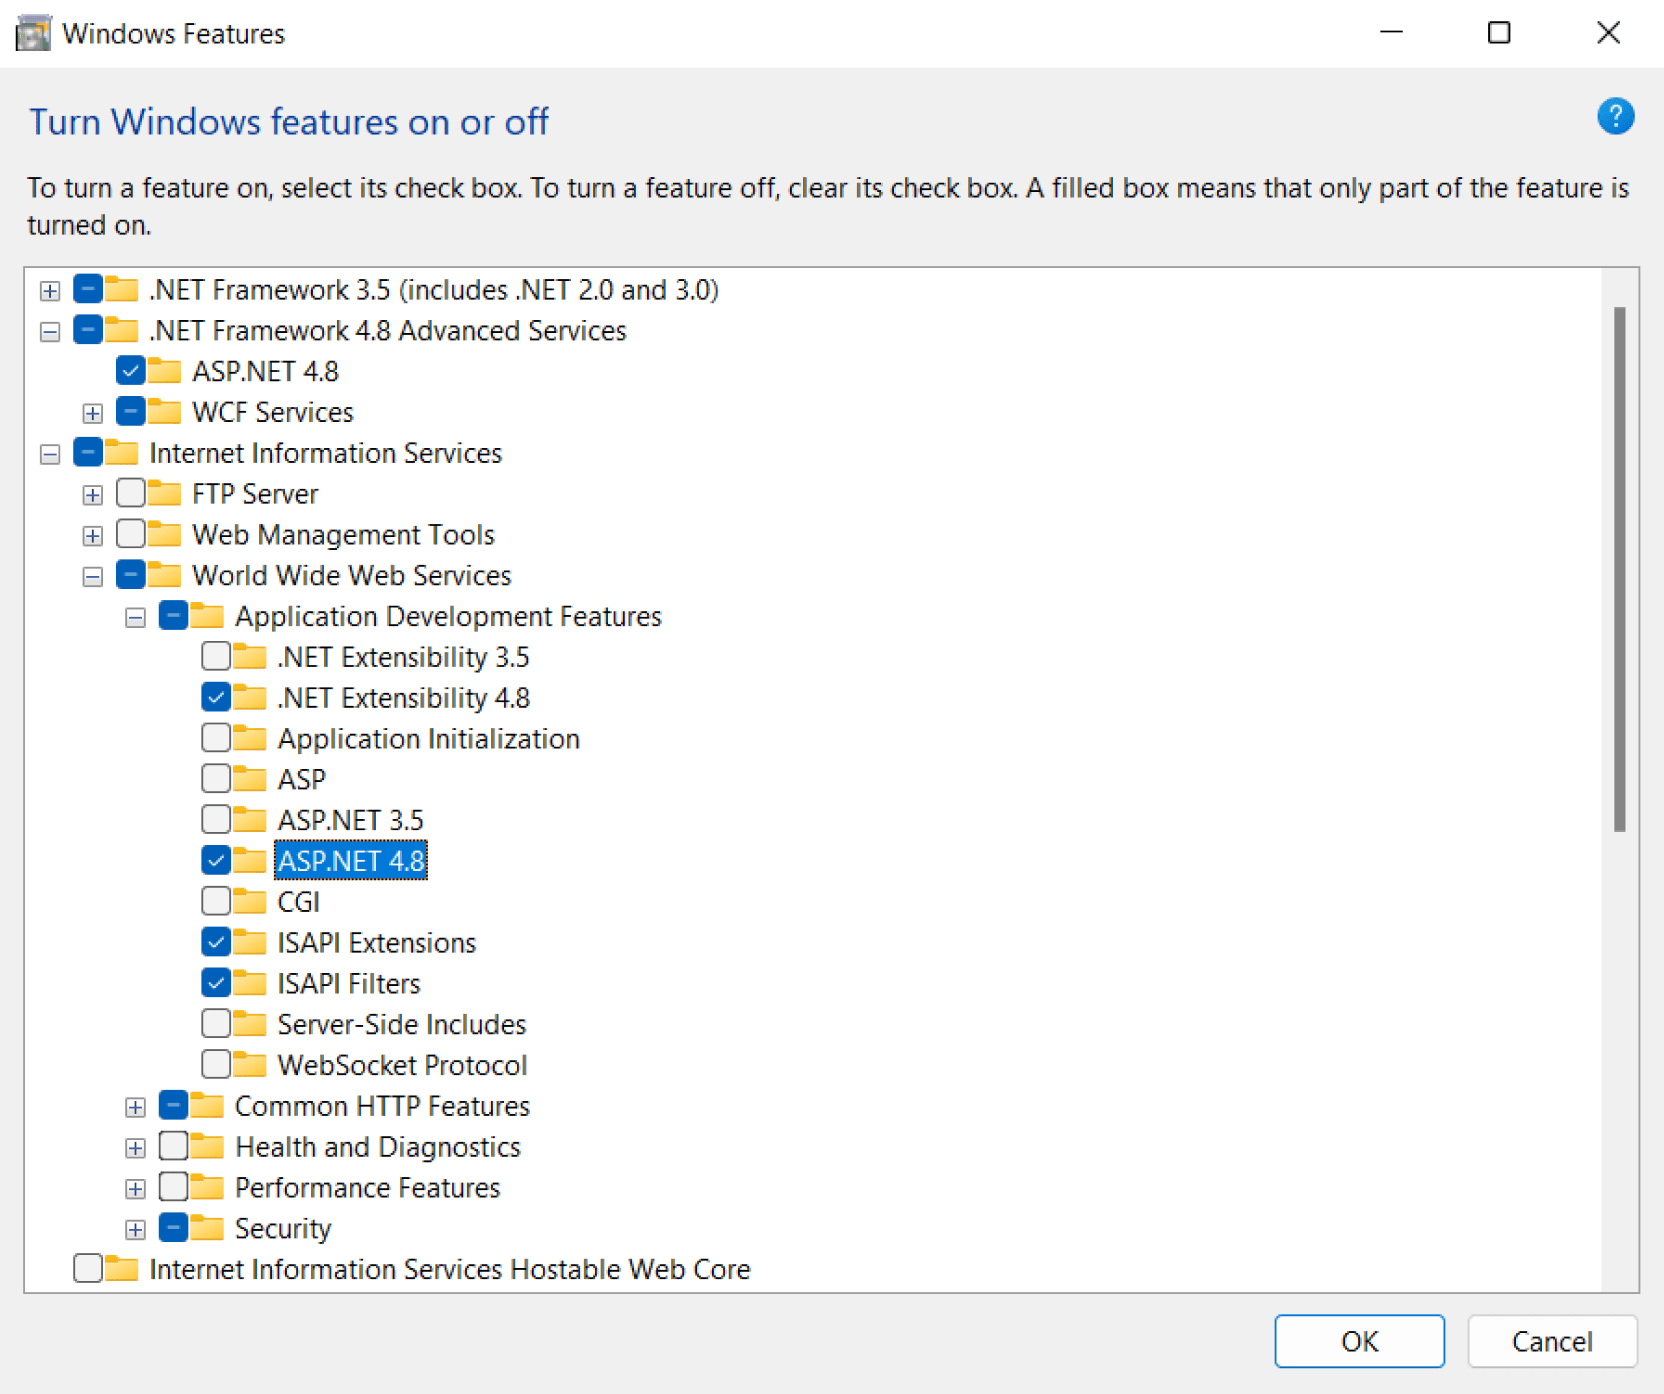
Enable ASP.NET 4.6 IIS features
Go to Start -> Control Panel -> Programs and Features and click the Turn Windows features on or off left menu option.
There select Internet Information Services -> World Wide Web Services -> Application Development Features and enable all the options for .NET 4.6 (these include .NET Extensibility 4.6 and ASP.NET 4.6 options):

Please make sure that the .NET Framework 4.6 Advanced Services -> ASP.NET 4.6 is also enabled.
-
Run the Internet Information Service (IIS) manager
To do that go to Start -> Control Panel -> Administrative Tools and run the Internet Information Services (IIS) Manager.
-
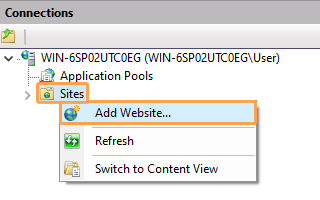
Add your website in the IIS Manager
On the Connections panel right-click the Sites node in the tree, then click Add Website...:

-
Configure your website
In the Add Website dialog box specify the name of the folder with the .Net (C#) / .Net (C# MVC) project in the Site name box.
Specify the path to the folder with your project in the Physical path box.
Specify the unique value used only for this website in the Port box:

-
Check for the .NET platform version specified in IIS manager for you website
Choose the v4.0. version for .NET CLR Version clicking the Application Pool then right-clicking the platform name select the Set application pool defaults and finally set the necessary .NET CLR version:

-
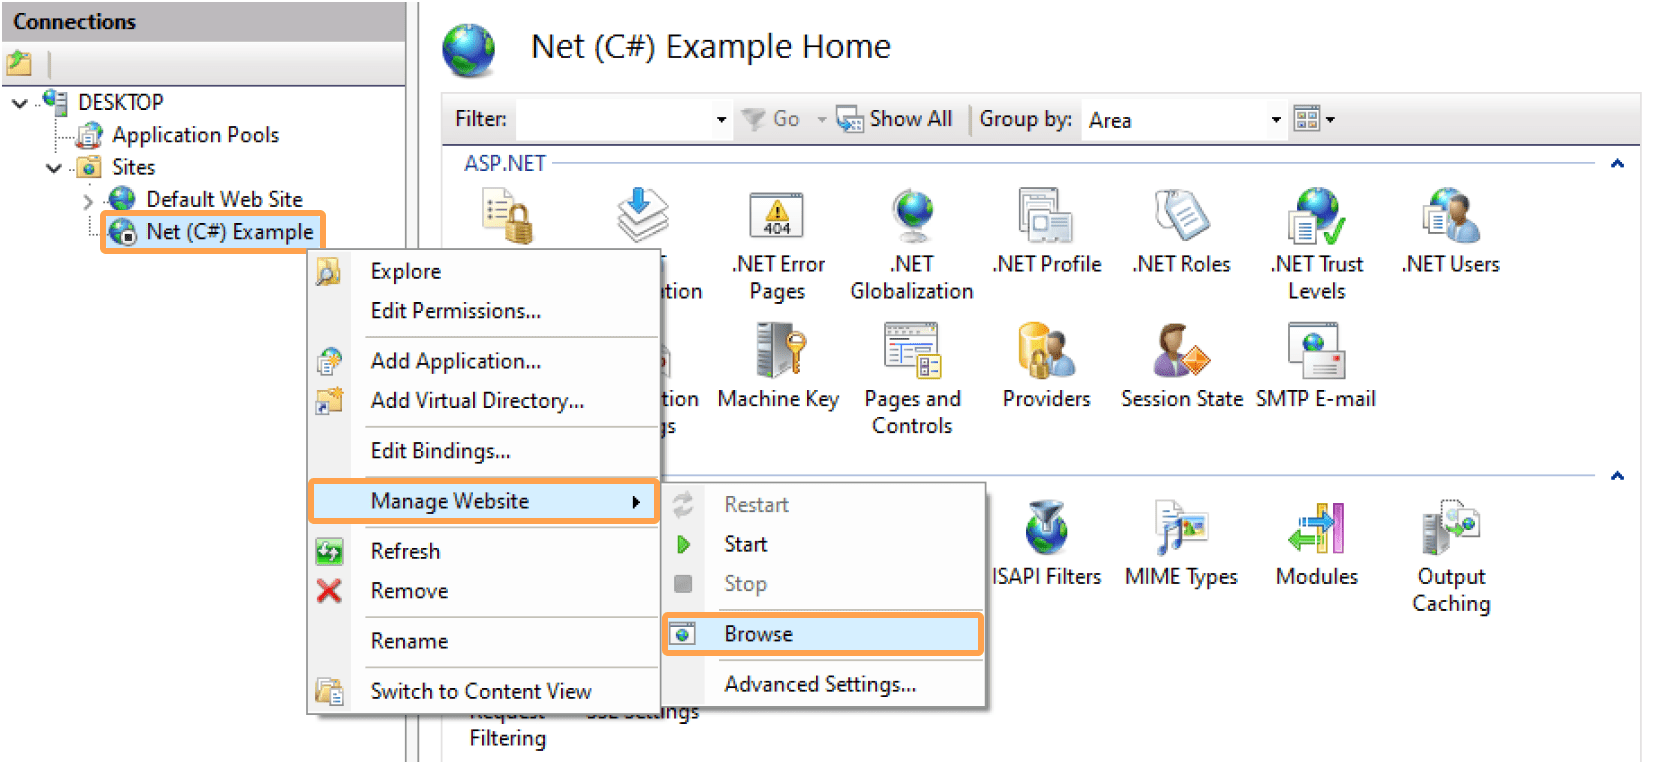
Browse your website with the IIS manager
Right-click the site, select the Manage Website contextual menu option, then use Browse:

If you want to experiment with the code changes, you can find the main application code in the \DocumentBuilder\Controllers\ control. The path to the ONLYOFFICE Document Builder executable can be changed in the web.config file in the following line:
<configuration>
    <appSettings>
        <add key="builder-path" value="C:\ONLYOFFICE\DocumentBuilder\docbuilder.exe" />
    </appSettings>
</configuration>
Set it to the actual path of the ONLYOFFICE Document Builder on your computer.